Connecting Mailchimp Account to Vacation Labs via Zapier
Overview
- Setting up your accounts
- Connecting Vacation Labs with Zapier
- Connecting Mailchimp with Zapier
- Using the appropriate trigger from Vacation Labs in Zapier
- New booking
- New passenger
- New customer
- New inquiry
- New contact-form submission
- Connecting Mailchimp as an Action in Zapier
- Confirming whether the data has been successfully pushed to Mailchimp.
Setting up your accounts
Connecting Vacation Labs with Zapier
 To connect Vacation Labs with Zapier, please follow the steps given in this support article
Connecting Mailchimp with Zapier
Login to Zapier and click on Apps
In the search box type Mailchimp and click on Connect

A popup window will open, prompting you to enter your login credentials for Mailchimp. Once entered, Mailchimp will be connected to Zapier.
General process of picking a trigger in Zapier
Login to Zapier, then click on "Create" and proceed to click on "Zaps."
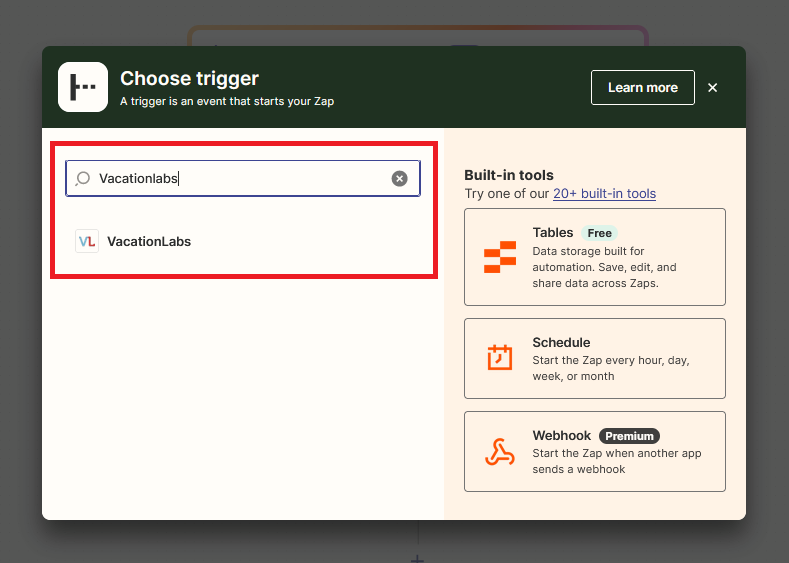
Click on Trigger
Type "VacationLabs" into the search box and choose it from the search results.
Select the "Event", triggering a dropdown menu to appear. From this dropdown menu, you can choose the specific event that will serve as the trigger, meaning the workflow will be activated when this event occurs in VacationLabs.
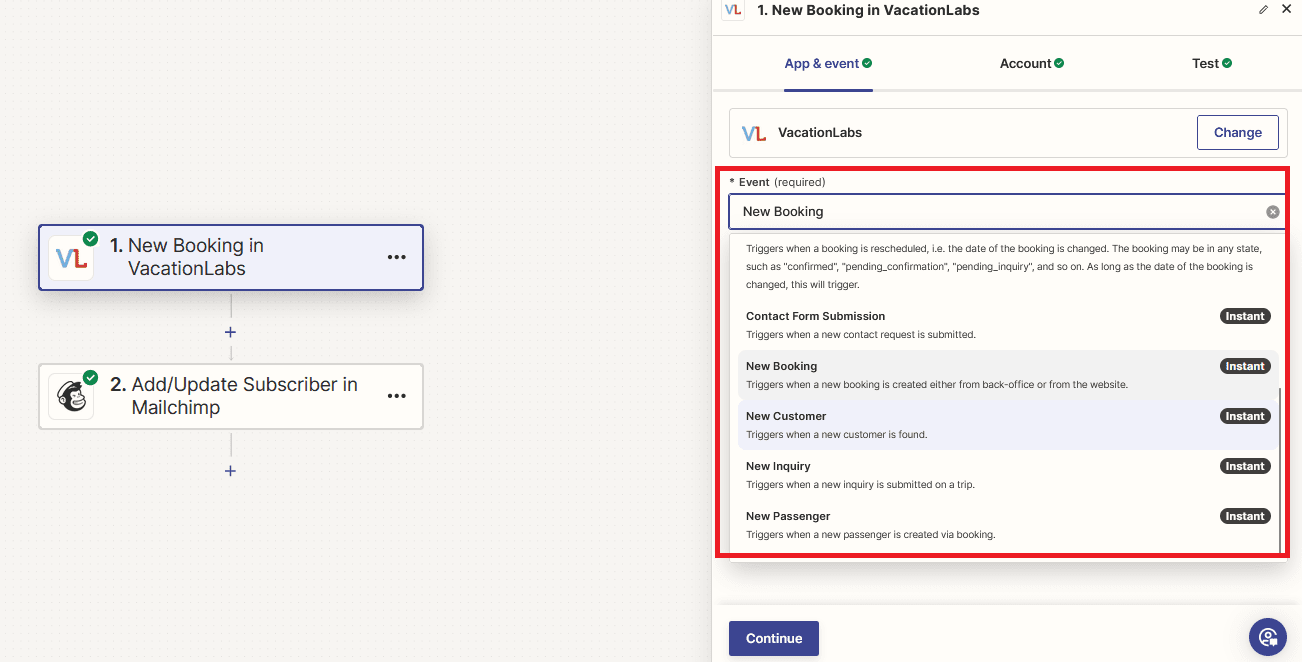
Click "Continue" after selecting the event.
In the next step, you will see the account that is already connected to Vacation Labs. If not, then you'll need to link your Vacation Labs account and proceed by clicking "Continue". Please refer to this link for detailed instructions.
Next, on the Testing step, Zapier will automatically test the event for a sample trigger/event imported from your Vacation Labs Account. If the imported data is correct, click Continue with selected record
Using the appropriate trigger from Vacation Labs in Zapier
Depending
upon how you're using your Vacation Labs account, there can be multiple
ways in which you will end-up collecting customer's contact
information, which you may want to then push to Mailchimp. Each of these
methods will be a different "trigger" in Zapier:
- New Booking: Whenever a new booking is made on the website, this event will be triggered.
- New Passenger: If the passenger form is enabled in the booking flow and a customer fills it out during a new booking, then this event will be triggered.
- New
Customer: "New customer" and "New Booking" events are triggered whenever a booking is made. However, if you're solely interested in customer information, then the "New customer" event can be utilized. This event allows you to push customer contact details, number of bookings made, and creation/update timestamps to Mailchimp. On the other hand, "New booking" should be selected when you require all booking details, including customer contact information. This trigger is used when focusing on comprehensive booking details.
- New Inquiry: Whenever a customer makes an inquiry using the "Enquire Now" button on the Tour page, then this event will be triggered.
- Contact
Form Submission: Whenever a customer completes the "Contact Us" form and successfully submits it, this event will be triggered. Please note that the contact form is different from an inquiry form. The contact form is a generic way for customers to reach out to you via the "Contact Us" page, whereas the inquiry form is available on individual tour pages .

Please be cautioned that contact form submissions are susceptible to spam attacks and you may end-up importing spam customers into your Mailchimp list. Please setup a double opt-in process in Mailchimp especially for customers imprted via the Contact form submission trigger, else you run the risk of your sender reputation being adversely affected.
Using the "New Booking" trigger
Whenever a customer makes a booking on your site, the contact details can be pushed to Mailchimp using this trigger. Please note that the payload of this event contains all the relevant booking details, whereas the payload of the 'New customer' event contains the customer's contact information, customer reference number, customer created at, updated at, number of bookings made, and last booking made.
Using the "New Passenger" trigger
If you have enabled a passenger form in the booking process, then whenever a customer makes a booking and there are multiple passengers, the customer will fill out the passenger form with all the contact details. If you want to push this data to Mailchimp, then this trigger can be used.
To learn more about how to enable the passenger form in a booking flow, please click here.
Using the "New Customer" trigger
Whenever a new customer makes a booking, that customer's contact information can be pushed to Mailchimp using this trigger. Please note that the payload of this event contains the customer's contact information, customer reference number, customer created at, updated at, number of bookings made, and last booking made, whereas the payload for the 'New booking' event contains all the relevant booking details.
To manage spam entries, you can activate double opt-in when sending data to Mailchimp. After completing the trigger steps, the subsequent action involves configuring the payloads to be sent to Mailchimp. In this step, please ensure to set the double opt-in option to true.
Using the "New Inquiry" trigger
Whenever a customer makes an inquiry using the "Enquire Now" button on the Tour page, those details can be pushed to Mailchimp using this trigger.
Please note the
payload of this event contain the trip ID and trip name against which the inquiry form was submitted, whereas the payload for the "Contact Form Submission" trigger does not.
Using the "Contact Form Submission" trigger
Whenever a customer completes the "Contact Us" form and successfully submits it, all the data can be pushed to Mailchimp using this trigger.
Please
note the
payload of this event contain the trip ID and trip name against which
the inquiry form was submitted, whereas the payload for the "Contact
Form Submission" trigger does not.
Connecting Mailchimp as an Action in Zapier
In the "Choose Action" step, search for Mailchimp and select it.
Select the "Event", triggering a dropdown menu to appear. From this dropdown menu, you can choose the specific event that will serve as an action For this example, we are selecting "Add/Update Subscriber" as an Action.
In the next step, you will see the account that is already connected to Mailchimp. If not, then you'll need to link your Mailchimp account and proceed by clicking "Continue"
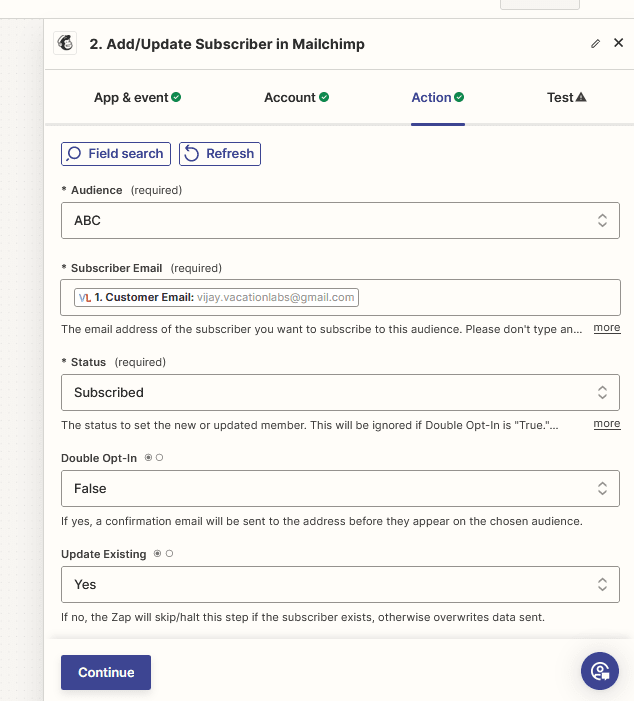
In the Action step, you need to select the audience. Choose the audience that you have created in Mailchimp. (If you haven't created an audience, log in to Mailchimp, navigate to "Audience", and create one).
In the Action step, you need to select the audience. Choose the audience that you have created in Mailchimp. (If you haven't created an audience, log in to Mailchimp, navigate to "Audience", and create one).
Below this, you can select which data you want to push to which field from Vacation Labs to Mailchimp. Then click on "Continue".
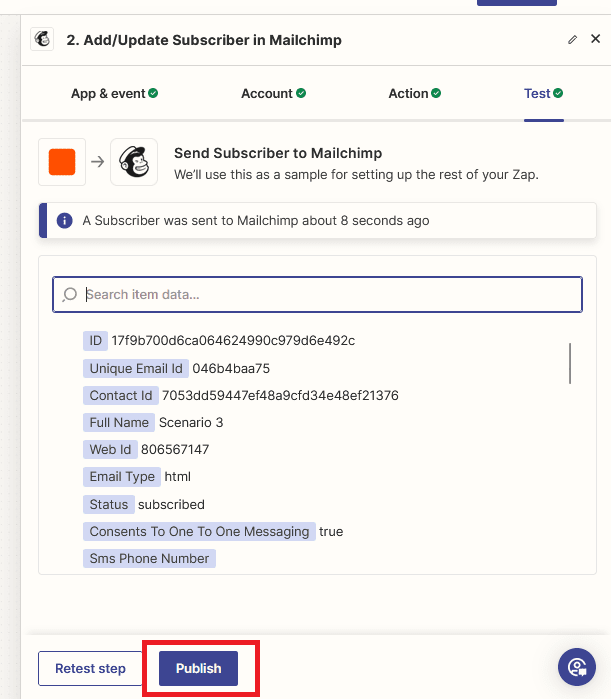
Then you can click on the Test step so Zapier will perform this test.
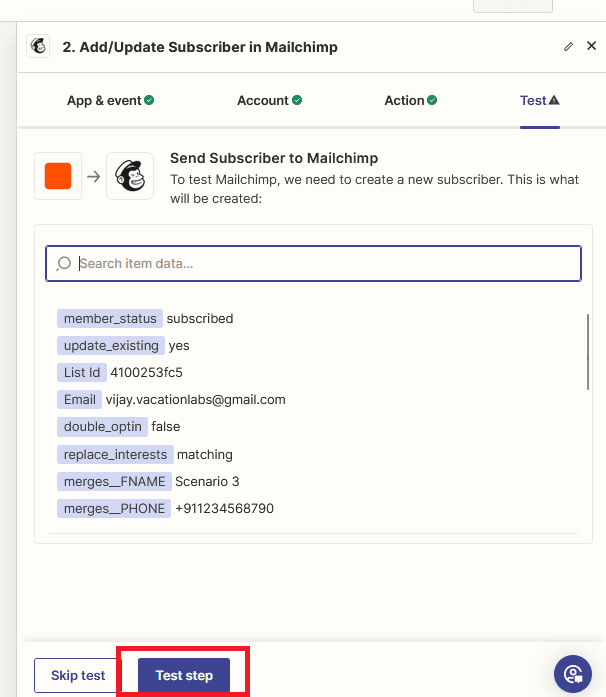
After the test succeeds, you can click on PUBLISH to make this workflow live.
Confirming whether the data has been successfully pushed to Mailchimp
Login to your Mailchimp account and navigate to Audience > All contacts to verify whether the data has been successfully pushed to Mailchimp.
Related Articles
Deducting TDS on payments made to Vacation Labs
You will be unable to deduct TDS while making a payment towards your Vacation Labs subscription invoice (due to a technical limitation in our subscription billing software). If you attempt to make a payment after deducting TDS, the billing system ...How to edit/modify Footer in Vacation Labs
Along with your website header, the website footer is equally important for any website. It allows you to show a brief summary of all your website content in short. Most of the customer prefer website footer as the first place on your website to get ...How to Install a Third-Party SSL Certificate on Vacation Labs?
Please follow the following steps to install SSL certificate files for your website on your Vacation Labs admin panel: SSL Certificate Files You can purchase SSL certificates from any 3rd party platform like GoDaddy, Name.com, Comodo, etc. Important ...How to add users or team members to your account?
Your Vacation Labs subscription plan allows you to give your team access to the Admin Panel. Each team member can be added as a User, and you can control exactly what parts of the system they can view or manage. Follow the steps below to add a new ...How to install custom CSS in Vacation Labs and its caveats
Important caveats - before you begin There is no support for custom CSS and there is no guarantee that your custom CSS will continue to work as the platform evolves and new features are released. Since Custom CSS scripts are installed by customers ...