Pushing all inquiries from Vacation Labs to Google Sheets using Zapier
Overview
We will walk-through the process of pushing all popup inquires received on the following custom inquiry form to a Google Sheet using Zapier.
Broadly the steps will be:
- Setting up your accounts
- Picking Vacation Labs > New Inquiry as a trigger in Zapier
- Connecting Google Sheet as a Action in Zapier
- Testing and Activation
Setting Up Your Accounts:
Before you start ensure you have accounts for Vacation Labs, Google Sheet, and Zapier. If you haven't already, create accounts and familiarize yourself with each platform's interface.

Please CLICK HERE to get detailed instructions on how to connect your Vacation Labs account with Zapier
Connecting Vacation Labs as a trigger in Zapier
- Go to the Zapier website and log in to your account.
- Click on Create and then on Zaps (refer screenshot below) T
- Click on Trigger (refer screenshot below)
- In the box that appears search for VacationLabs and click on it (refer screenshot below)
- Click
on the box below Event and a dropdown will appear, from this dropdown
you can select the Event that will act as the trigger (i.e, the workflow
will get triggered when this event happens in VL). You can choose from
options such as New Booking, New Inquiry, Booking Confirmed etc. (refer
screenshot below) For this example we are picking "New Inquiry" as the trigger (as you want to push all pop-up inquiry form submissions to the Google sheet).
Let's take this Custom Inquiry Form into consideration (refer screenshot below) - Click on Continue once you have selected the Event
- On the next page you will need to connect your Vacation Labs account (if not already connected via apps) and then click on continue. Please CLICK HERE to get detailed instructions on how to connect your Vacation Labs Account with Zapier.
- Then
on the next page, zapier will import records from your Vacation Labs account (in this case recent pop up enquiry form submissions have been imported) refer screenshot below
- Select any one of the imported record and click on Continue with selected record (refer screenshot below)
This concludes the Trigger part of the workflow
Connecting Google Sheets as an Action in Zapier
1. In the Choose Action box that appears search for Google Sheet and click on it (refer
screenshot below)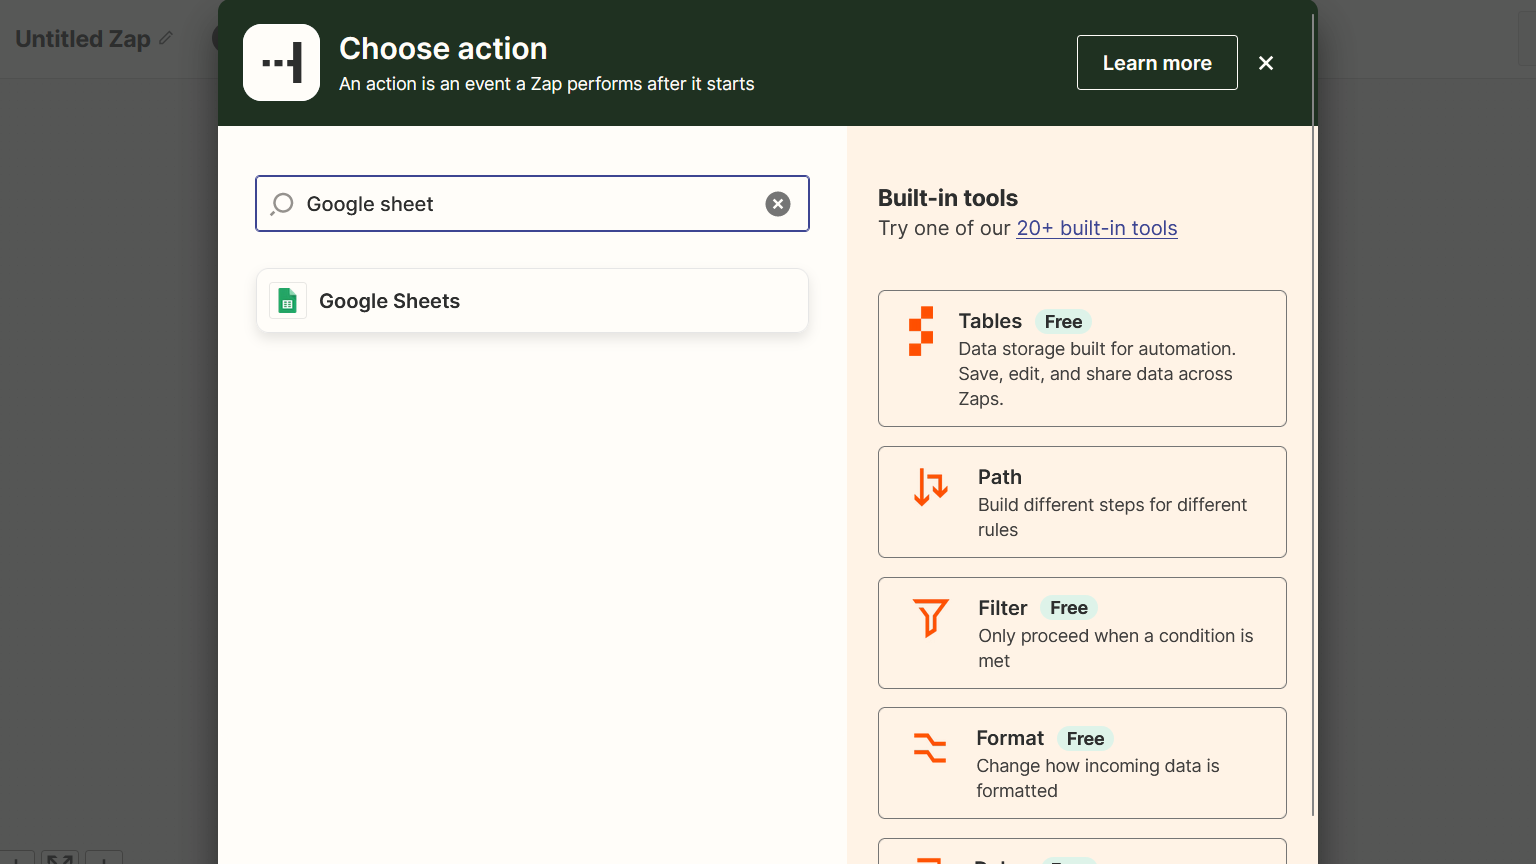
2. Select your desired event such as create worksheet, updated worksheet raw etc.In Zapier, when you select Google Sheets as the action, you're specifying what should happen within a Google Sheets spreadsheet as a result of a trigger event from another application. For example:
Create Spreadsheet Row: This action adds a new row of data to a specified Google Sheets spreadsheet.
Update Spreadsheet Row: This action updates an existing row in a specified Google Sheets spreadsheet with new data.
Append to Spreadsheet: This action adds data to the end of a specified sheet within a Google Sheets spreadsheet.
Create Spreadsheet Worksheet: This action creates a new worksheet (tab) within a specified Google Sheets spreadsheet.
Find Spreadsheet Row: This action searches for a specific row in a Google Sheets spreadsheet based on specified criteria.
By choosing one of these actions, you're instructing Zapier to perform a specific task within your Google Sheets spreadsheet based on the trigger event from another application.
(For this example we are choosing update worksheet raw) and click on Continue (refer screenshot below)
3. Connect your Google Sheets Account and click on Continue (refer screenshot below)
4. On the next page you can select which drive you want, in which spreadsheet you want the data, which worksheet and which information in which row/field. After entering all the necessary information click on Continue (refer screenshot below)

Please note: you will need to put the columns/rows header in the sheet beforehand so that Zapier can read it and then you can map data those columns easily, also please create separate headings for separate passenger categories such as Adult, child, couple etc.
5. On the next page click on Test Step/ Retest step (refer screenshot below)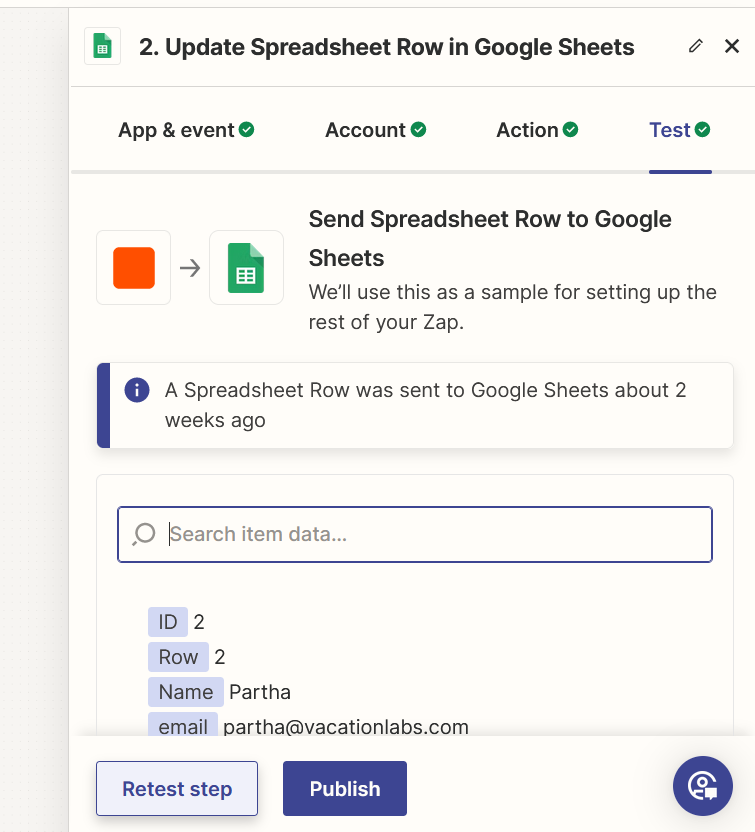
6. Once the test succeeds please click on Publish to make the workflow live (refer screenshot below)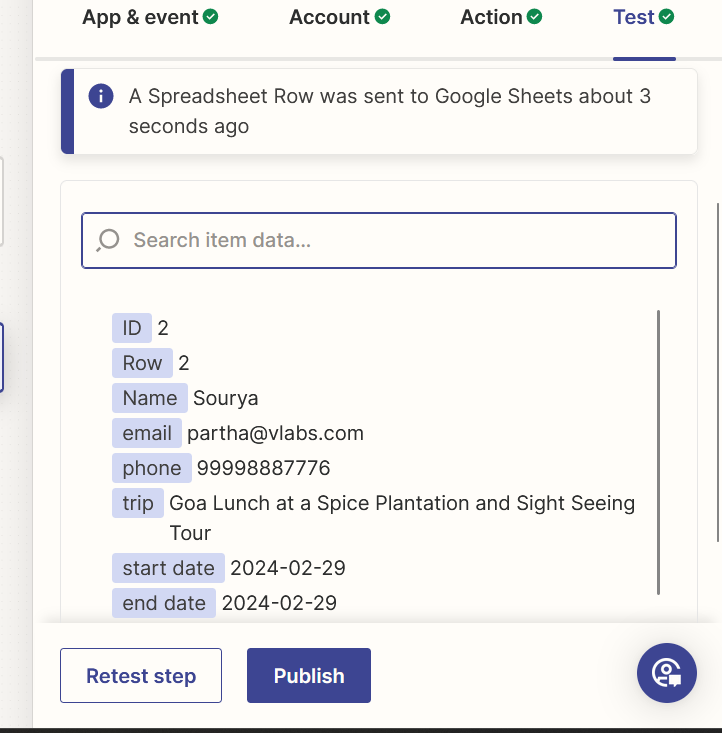
This concludes the setting up of Google Sheets as Action in Zapier tutorial
Checking if the workflow is working
1. Open any trip page and click on Enquire Now and fill the details the Inquiry form (refer screenshot below) and click on Send Enquiry2. Once it is submitted, login to Zapier and click on Zap History(refer screenshot below) 
3. Locate the Workflow based on the time and click on it (in this example the workflow is of Untitled Zap and ran on 15 March 2024 3:20 PM so we will click on it
5. On the next page you will be able to see the status of the Zap as well as the data out i.e data sent to google sheets (refer screenshot below)
You can then view the pushed data in the google sheet as well (refer screenshot below)
Related Articles
Vacation Labs and Zapier
We are now available on Zapier, a platform that allows our users to connect their Vacation Labs portal to any of the 3000+ applications available on Zapier. Through this integration you can automate your operations and repetitive tasks and in turn ...Connecting your Vacation Labs account in Zapier
Overview There are two ways in which you can connect your Vacation Labs account with Zapier. Both differ only in terms of the starting point / starting screen. The end-results will be similar: In the Apps section, independently of creating a workflow ...Trigger Events available on Zapier
Currently, there are 9 trigger events available on Zapier for Vacation Labs: Trigger Events available on Zapier Any Other Booking Operation: Triggers when any operation is performed on the booking that is not already handled by some other trigger. ...Integrating VacationLabs with CRM via Zapier
Overview Setting up your accounts Connecting Vacation Labs with Zapier Connecting Zoho CRM with Zapier Connecting Vacation Labs as a trigger in Zapier Connecting CRM as a Action in Zapier Testing and Verification Setting Up Your Accounts: Before you ...Updating dates, rates, and available for multiple tours using Accelerate
Overview Importing Trip Data Updating Prices for trips Special note for group / slab pricing Updating Open slots for trips Opening a new slot Modifying a currently open slot Closing a slot Verifying the changes Please follow the following steps to ...